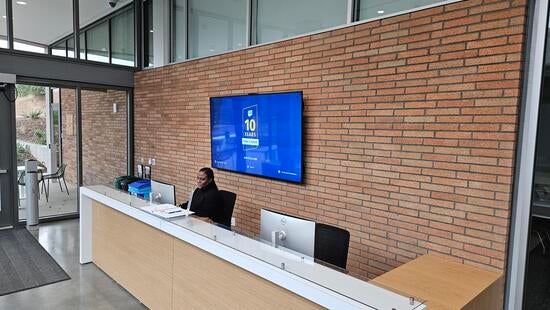
Digital Signage at the SOM
The School of Medicine Ed Buildings I and II each have multiple display screens in the building. These screens serve as an electronic bulletin board where announcements can be placed. These can include upcoming events, deadlines, and facts or areas of promotion.
When properly used with other resources, can provide audience members with superior informational experience.
How to Upload Content to the Digital Screens
Use the digital sign files in these Canva Templates to create the image. Follow the steps below to create and download your image.
If you do not wish to use the available templates, you may create your image using another platform, but it must meet the guidelines posted elsewhere on this page.
If you do not have access to the Zoom system
Submit a ticket through the SOM Facilities Planning Request Form. Include the following information:
- Date you want it to appear
- Date you want it removed
- What screens you want it to appear on.
- The list of available screens can be found below.
Please submit your art no fewer than three business days before you want it to appear on the screens.
If you have questions, please contact Clark Hapeman.
If you do have access to the Zoom system
If you are posting the image to multiple screens, we recommend uploading the image to the SOM folder in the Digital Signage Content section first, then using that to upload the images to each screen. That simplifies the removal process.
About the Digital Screen System
Access
The digital signage in the SOM ED I and II buildings are powered by Zoom. Access to the screen management feature is provided by UCR ITS - Multimedia.
SOM orgs that will be often posting content to the screens can request to be granted a seat by contacting the Office of Strategic Initiatives. Training will be required for users of the Zoom screens.
Locations
Education Building II
- First floor
- Reception desk
- Entryway of Classroom 104
- Entryway of Classroom 106
- Second floor
- Elevator
- Student Lounge 1
- Student Lounge 2
- Third floor
- Elevator
- Fourth floor
- Elevator
- Fifth floor
- Elevator
Education Building I
- Ground Floor
- Outside Anatomy Lab
- First Floor
- Lobby
Types of Content that Can and Cannot Be Presented
- Events
- Conferences
- Meetings
- Lectures
- Student, faculty and staff activities
- Building and facility announcements
- Closures
- Policy reminders
Things that will not be included
- Stand-alone event photos
- News items
- Announcements of national recognition
How to Select the Screens You Will Use
Be aware of which audiences are looking at which screens. For example, in general:
- Students are likely to see screens on the first two floors and in SOM Ed I
- Staff are likely to see screens on all five floors and SOM Ed I
- Faculty are likely to see screens on all five floors and the main lobby of Ed I
- Not all content should be placed on every screen
- For example, events that are student-specific should be limited to the screens outside rooms 104 and 106, the second floor student lounge, and the second and third floor screens outside the elevators
- Major SOM events could appear on the upper floor elevator screens as well as the reception desk screen on the first floor
- Content may not be displayed in classroom screens without express permission from the Dean’s Office
Display Times
- Content with words (e.g. event announcements) should display for 30 seconds
- Filler content (e.g. a logo) should display for 20 seconds
- In certain circumstances, content can be set to appear for more than 30 seconds, with a maximum of 60 seconds
Screen Content Details
Content Size
- Images should be 1920x1080 (16x9 ratio)
- Content should be PNG files
- Never use JPEGs or GIF
QR Codes
- You are encouraged to use QR codes for links
- You can use URLs, no more than 20 characters
Fonts
- When possible use UCR branded fonts (Rift and Fira Sans)
- When not available, use Arial, Helvetica, or Veranda
- Avoid serif fonts as they are harder to read on screens
- Minimum font size is 20pt
- Avoid using italics, unless it is for brief emphasis
- Avoid using underlines
- Use bold sparingly, and only for emphasis
- Use contrasting colors — dark text on light backgrounds and light text on dark backgrounds
Using the Canva Templates
- Create an account on Canva using your UC Riverside credentials. (Note that the University of California will be providing access to Canva to all employees beginning in early 2024.)
- Click this link to access the Canva Templates
- Before creating your image, go to File and select "make a copy." This will create a copy of the Canva template on your account.
- You may use any of the templates you wish.
- If you edit the template, please be sure to abide by the design guidelines listed above
- When you are happy with your image, follow these steps
- Save your project
- Click the "share" button on the top right and go to "download"
- Under file type, select PNG
- Under "select pages" use the pull down to select the page in the template that contains your image
- Click the download button and save the file in an easy to find place on your computer
- Upload your file to Zoom or email it for upload
- Be sure to include the dates and the screens upon which you want it to appear.
